For the most part, the Meshify design was retained for the front. Only at the transition to the frame a change was made. A gap can now be seen here, which was created due to the new function or opening method of the front panel. In the predecessor, the entire front panel was made of one piece and had to be removed with a certain amount of force. With the Meshify 2 Compact, the mesh inside can now be conveniently opened to the side. This gives quick and easy access to the front fans, as well as the dust filter behind the steel mesh.
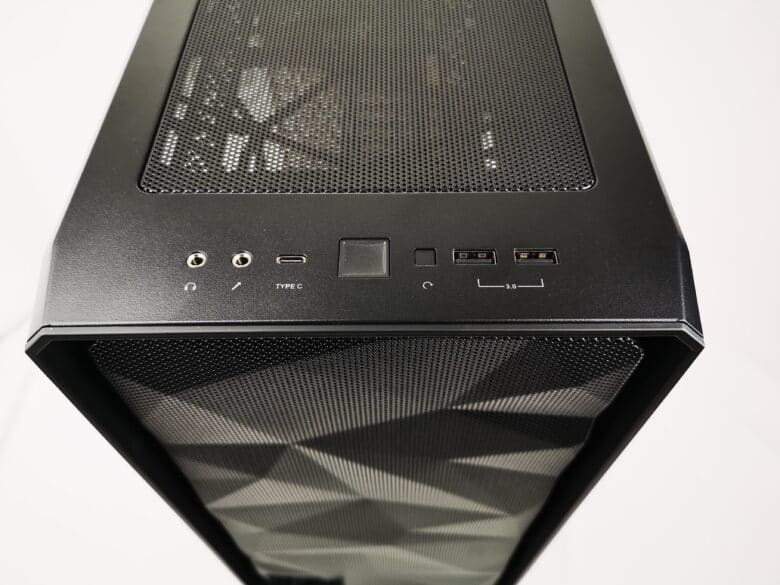
The front I/O also features an innovation. In addition to two USB-A 3.0 ports, the case also has a modern USB-C 3.1 port. It supports fast charging and transfer rates of up to 10 GBps. Next to the typical audio jacks, the buttons for power and reset are also found. The power button is a bit difficult to press for our taste. However, it gives a nice feedback with a clicking noise when turned on.
Fractal Design has also redesigned the top cover. It is now completely removable and not only provides further protection from dust with another dust filter behind the steel mesh, but also improves airflow with the removal of the nylon filter. The top cover can simply be lifted out upwards. The dust filter has to be lifted first and then pulled out to the back. Once both are removed, you have free access to the radiator frame and the inner workings. Thus, the installation, in this yet so compact case, is further simplified.
The bottom is peppered with another nylon dust filter, which, if you want to remove it, can be pulled out towards the front. Below the filter is a nice perforation, which can also be found in the rear area. Four mounting tracks can also be seen, which offer the possibility to attach an HDD cage, hard drives or another 120 mm fan. The feet are rubberized and provide the case with enough clearance from the ground so that enough air can find its way around the bottom of the case.
For the most part, the rear is unremarkable. It offers seven PCI Express slots, a mounting frame for power supplies, and the typical bulge for the motherboard connectors. For the fan area and a strip below, perforations have also been created to ensure air escapes. On the top of the rear we find a novelty, because here is the opening mechanism for the side panels. The side panels can be removed by simply pulling the plastic caps in the respective direction. We can also see a small notch that forms a grip point for lifting out the top cover.