Android is one of the most common operating systems out there. It has proven to dominate the smartphone market but is yet to get its way into the world of PCs. This is not to mean that you cannot enjoy having an Android environment on your computer. You can do so using virtualization software.
There are many reasons why you would want to have the latest Android 8.1 Oreo on your computer. It could be that you are a developer and have decided to venture into Android apps. You will need an emulator to test the apps you develop. You can use virtualization software to create an Android device-like environment on which you can try out the application. Perhaps you are just curious what the Oreo has to offer. You can find out by running it on a virtual machine. Doing this should actually be the first step before any Android user upgrades their Operating System.
An Android virtual machine can be created using various virtualization software solutions available. There are many of them but only two have the very best features. These are VirtualBox and VMware. Their free versions are feature-laden while their paid versions make the impossible possible. Users get access to every feature of Android just like it works on a phone. Developers will appreciate the fact that they can create different Android device-like virtual machines so they can test apps on devices of different specifications. They will be able to easily create virtual machines with different RAM, ROM, and other specs so as to determine how the app will work on different Android phones.
Installing Android 9.0 Pie on VMware Player (free)
Step 1: Install Vmware Player and Download Android Pie Disk ISO
Download and install the VMWare Player and Android Pie Disk ISO file for personal use choose the free version while advanced users will need the paid version that has more features to offer. Either way, you will need to head over to the VMware Player download page. Select what you want to download and click on the “download now” button.
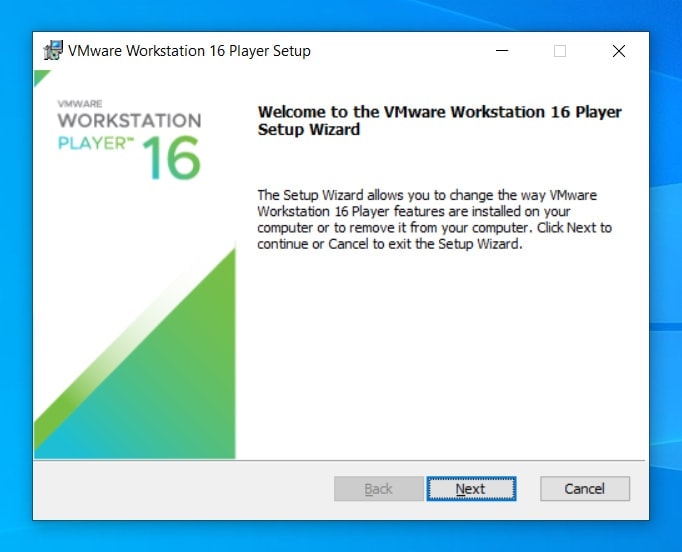 Install VMware Workstation 16 Player
To install the VMware you will need to navigate to where the downloaded file is located. The file to look for here has a .exe extension. Right click on it and choose “Run as Administrator”. An installation wizard will guide you through the process. When done with the installation you will need to restart your computer before proceeding.
Step 2: Create a New Virtual Machine
Start off by clicking on the “Create a New Virtual Machine” button. Then click “I will install the operating system later”. When the “Guest Operating System Installation” window comes up, choose to install the operating system later. Next, you will be required to select the guest operating system. Click on the radio button next to “Linux” and choose the version as “Other Linux 4.x”.
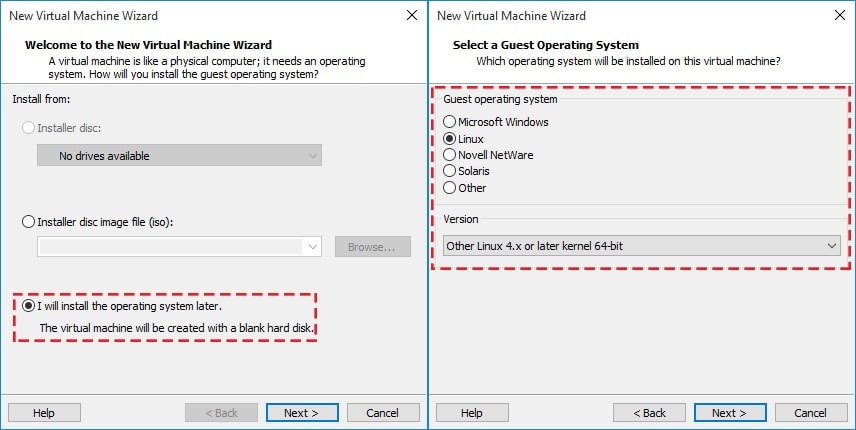 Guest Operating System Installation
Next are the name and location. Choose a name that is easy and sensible. “Android 9.0 Pie” would be a good choice. As for the location, specify where the virtual machine is to be stored. Then click “Customize Hardware” You can choose any size RAM and CPU. Click on the “Memory” menu and set the memory you would like to allocate to the VM. Choose over 1GB but do not exceed the maximum memory size that is recommended.
Under the hardware tab, click on “CD/DVD (IDE)” and on the small window that opens to the right, select to Use ISO Image file. Click on the Browse button and go to where the Android 9.0 ISO file is located. Select it and press the “Open” button.
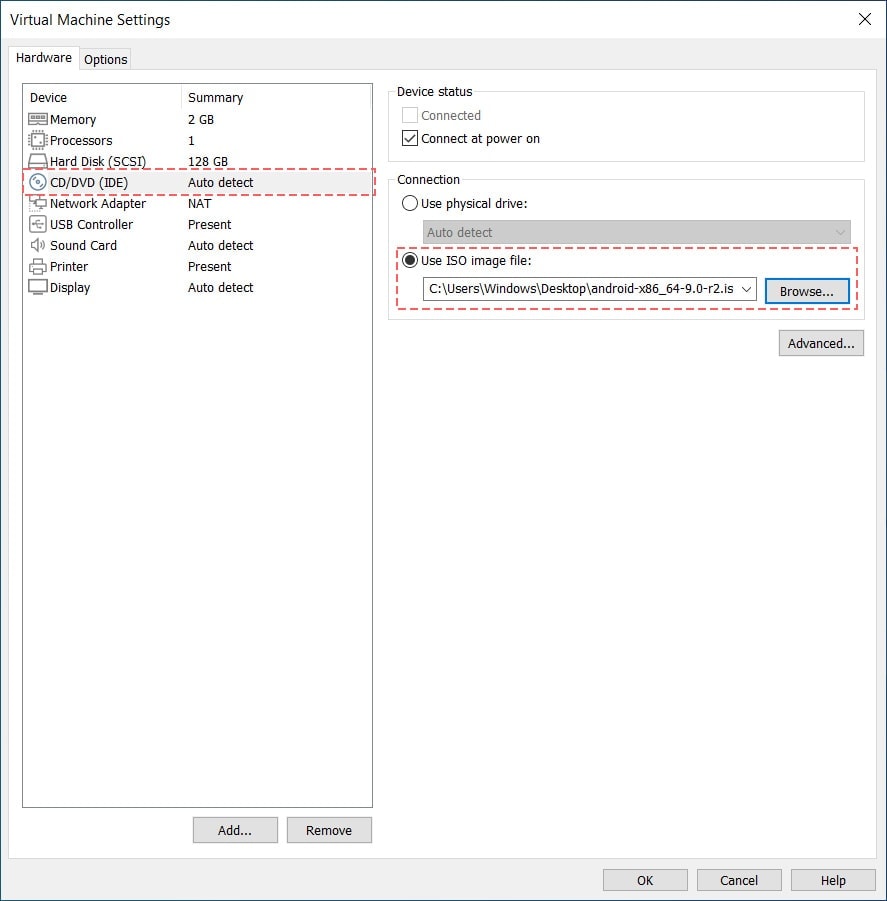 Add Android 9.0 ISO Image to VMware
Then select tab “Display” and enable “Accelerate 3D Graphics”.
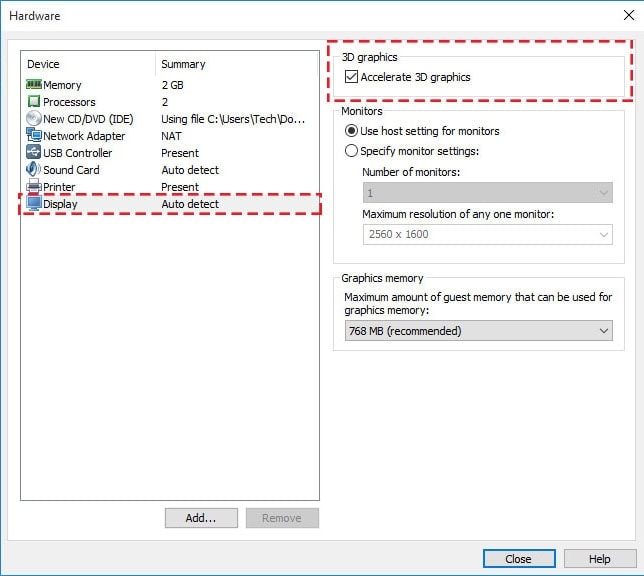 Enable 3D Graphics
Confirm that they are accurate and click on the “Close” button. The virtual machine will be created within a short time.
Go to Network Tab in VMware and disable “Connect at power on”
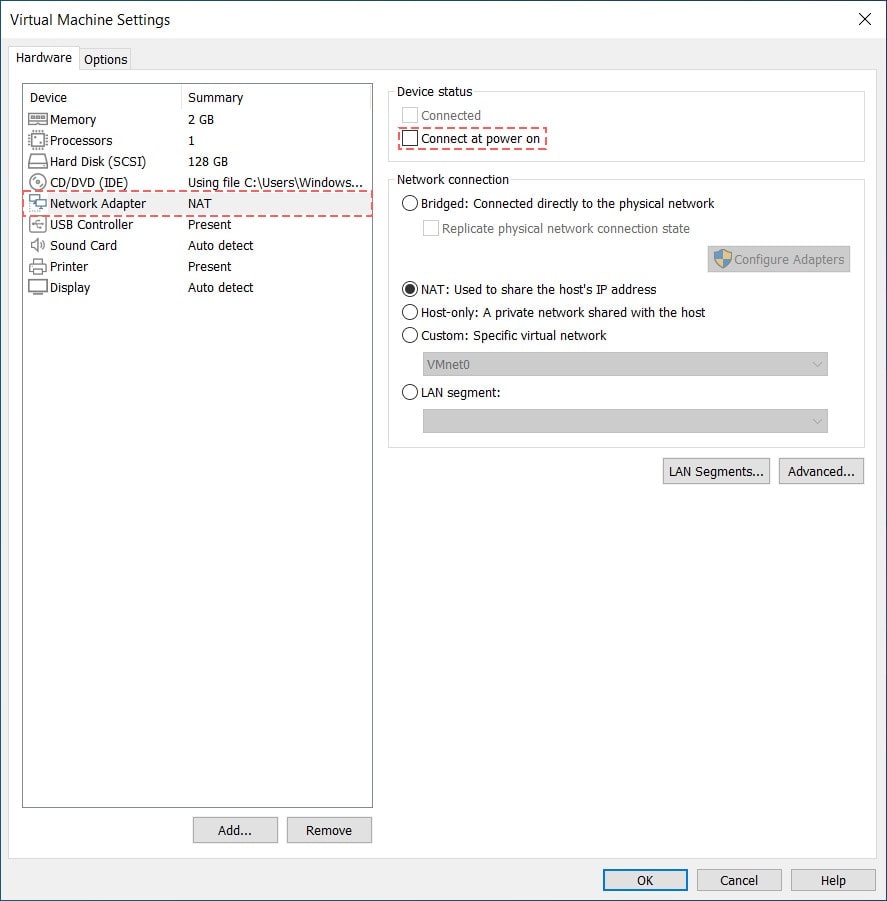 Disconnect Network at Power On
Step 3: Install VMware Android 9.0 Pie
Click on the “Power on this Virtual Machine” option to start the installation process. A few seconds later a blue screen will appear. On this screen, select the “Advanced options“. Next click “Auto Installation” to install android 9.0 in VMware
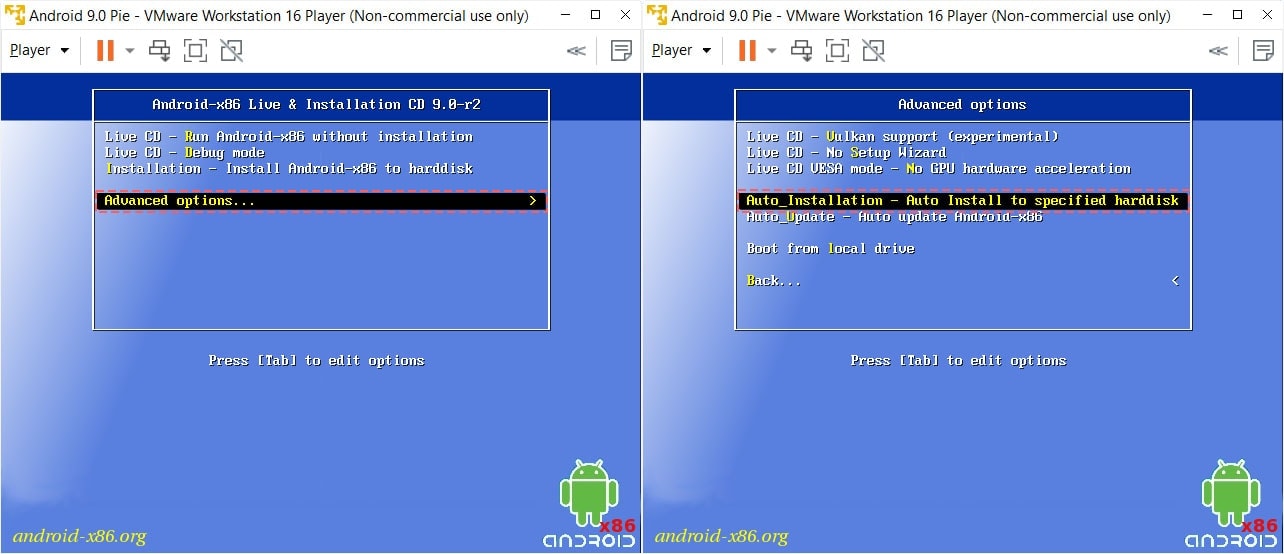 Advanced Options to install Android 9.0 on VMware
When the installation is done, right click on “CD/DVD icon” and select “Disconnect“, then click “Reboot” the VM. As you reboot, you will see a black screen with writings on it.
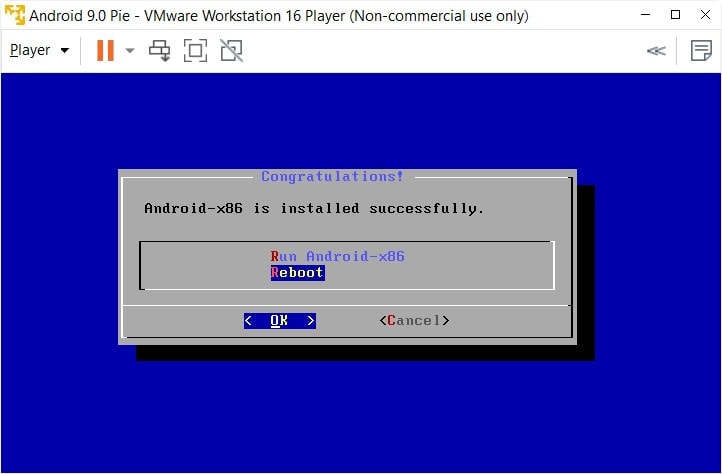 Reboot your Virtual Machine
Step 4: Boot with xForce Mode
Press “e” button to edit this command before booting.
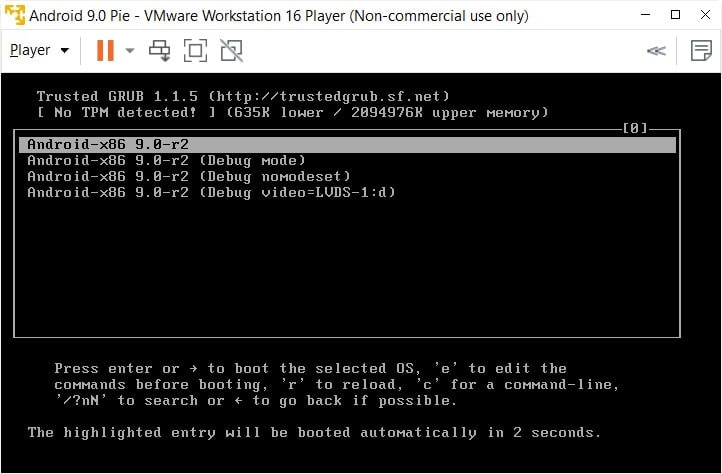 Press e to edit the commands before booting
Press “e” button again, and move the cursor to left-hand. Replace “quiet” parameter with “nomodeset xforcevesa”, then press “Enter” to save and press “b” button to boot.
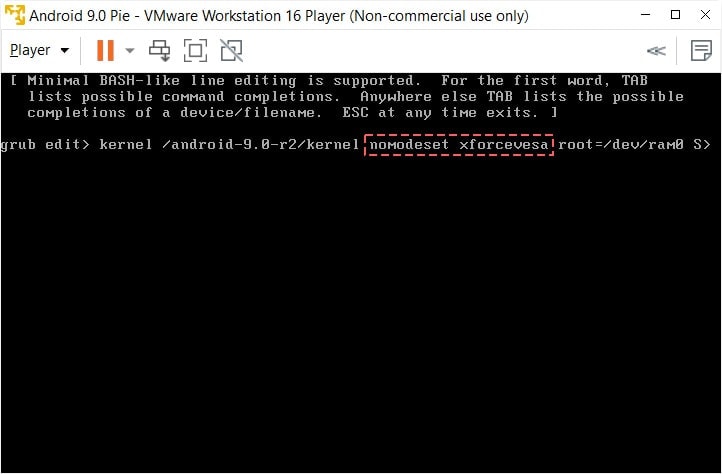 Boot to Xforce mode with Android in VMware
Step 5: Enjoy the cool features of your VMware Android Pie VM
When the startup is complete, you will see a screen that resembles an Android phone’s. Click on “Skip” button to connect Wifi and create a new account.
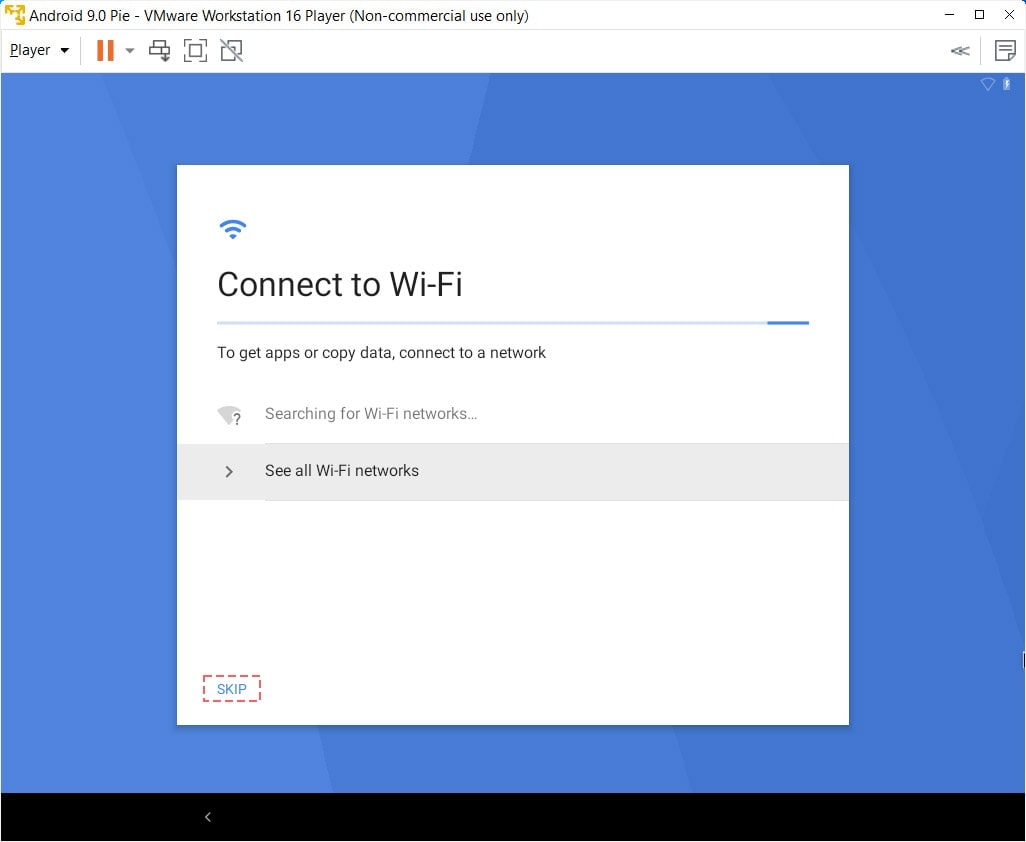
You can now check out the cool features of the Android Pie. Download and install apps you love. Enjoy games, chat applications and much more on the new and improved Oreo; right on your computer! You are done and we congratulate you. Please do let us know if you face any problems.
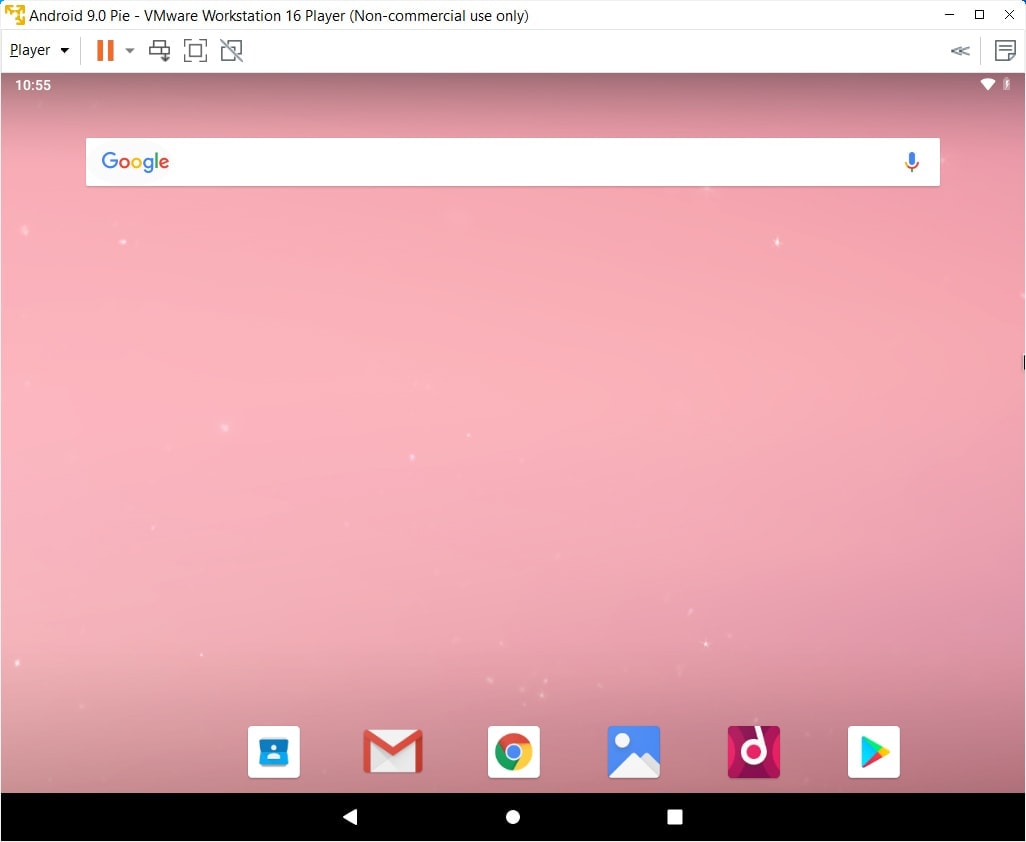 Android 9.0 on VMware
To connect Internet Android 9.0 Pie on VMware, Click on Player – Removable Devices – Network Adapter – Connect. In Android 9.0 on VMware go to Wifi Settings and connect to “VirWifi” to connect VMware Network.
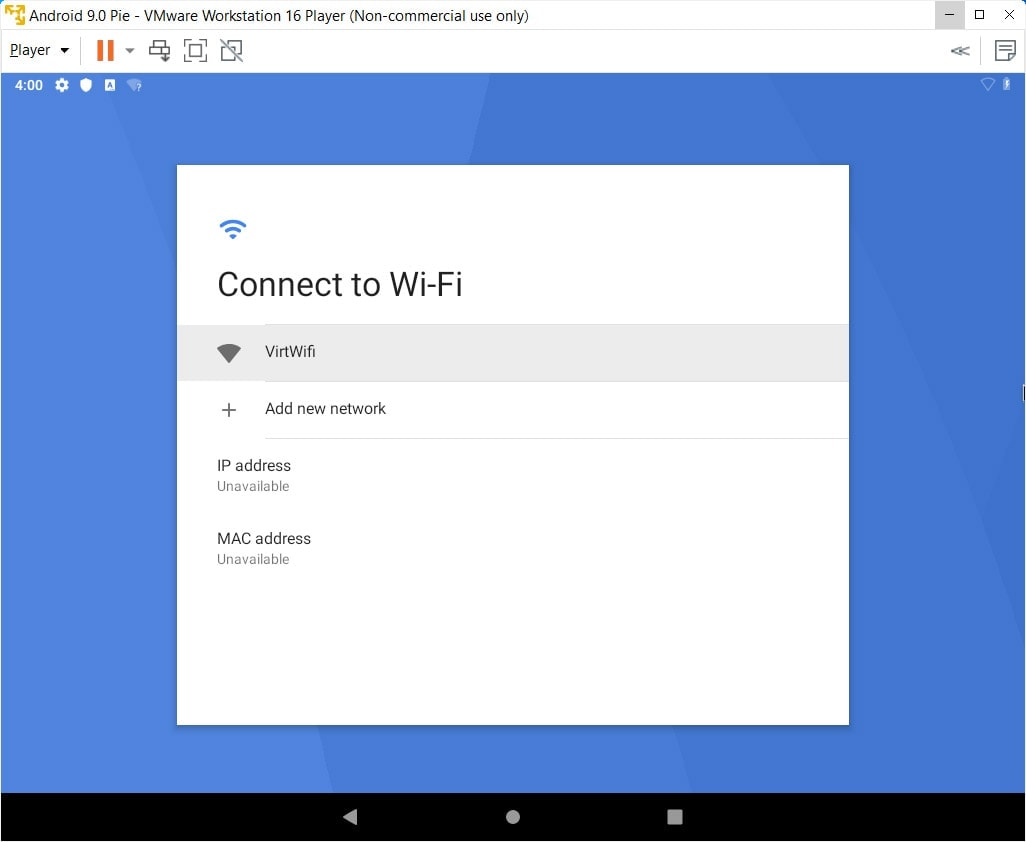 Connect to Internet for Android in VMware
Installing Android 9.0 Pie on VirtualBox
Step 1: Install VirtualBox and Download Android Pie ISO File
Download all you will require In order to proceed, you will need to download two important files. One is the VirtualBox installation file that can be found at the developer’s official website. Second is the Android 9.0 ISO file. You can also opt for a disk image depending on what you prefer. Just ensure that the site from which you download is trustworthy.
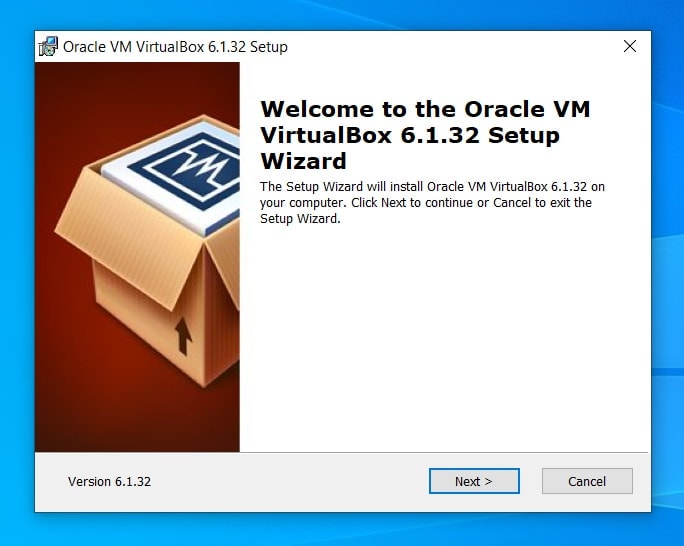 Install VirtualBox 6.1
Double-click on the .exe (on Windows) or .dmg (for MacOS) Virtualbox file and the installation process will start. This is very easy with prompts on the screen guiding you through the entire process. Follow these and you will be done in a few seconds.
Step 2: Create the Virtual Android Machine
Press the “New” button and the process of creating a new virtual machine on VirtualBox will be started. All you will have to do on each screen is making a few changes and press “Next”.
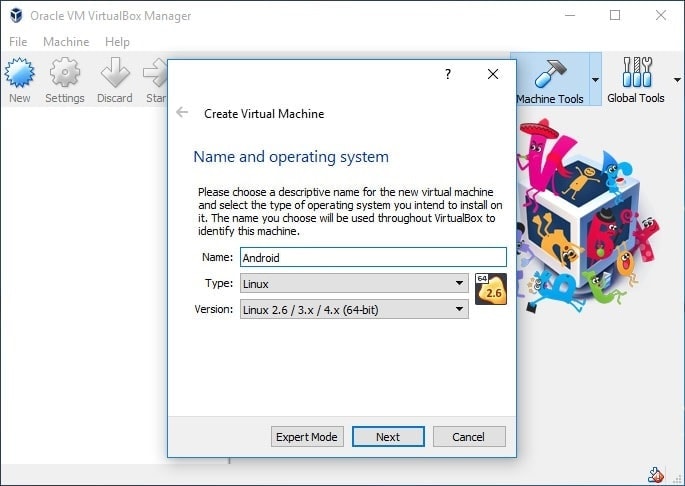 Create Android Virtual Machine on VirtualBox
On the next screen, you will be required to choose the name of the VM, its type and version. The name can be anything you want but the Type and Version have to be “Linux” and “Other Linux (64-bit)” respectively.
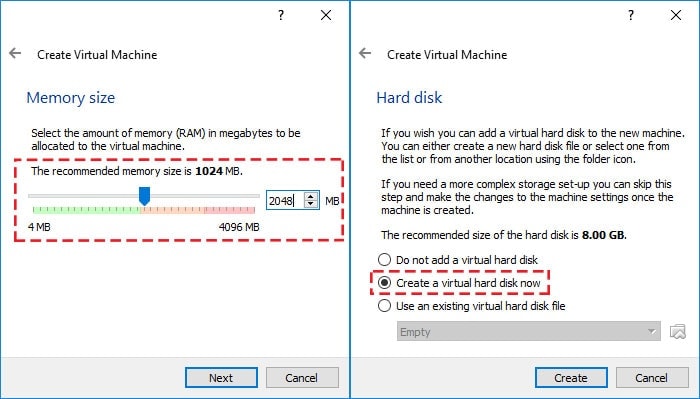 RAM and Create a Virtual Hard Disk
When prompted to choose the memory size, adjust it so it is 2048MB. This selects the amount of RAM the new VM will be using. It should be about 50% of what you have for the best performances. On the Hard disk window, choose to create the virtual hard disk now and select “VDI (VirtualBox Disk Image)”, As for the storage on physical hard disk, choose “Dynamically allocated”.
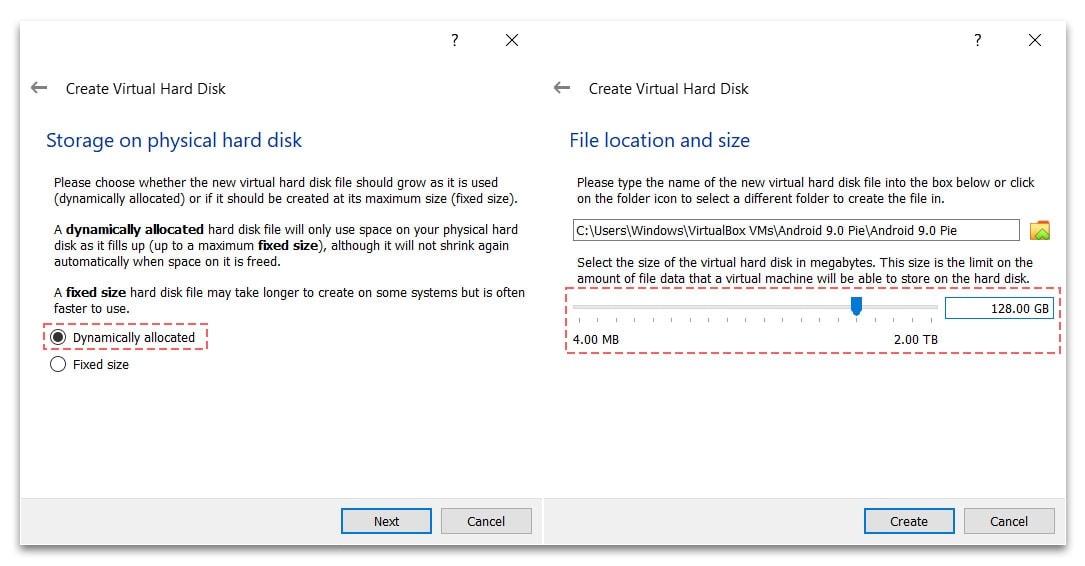 Hard Disk Size for Android
The remaining steps involve choosing the file size and location. The file size refers to the maximum amount of data the virtual machine can store on the physical hard disk. All done! Click on the “Create” button and be patient as your virtual machine is created.
Step 3: Edit the Virtual Android Pie Machine
Select the newly created Virtual Machine (shown on the left-hand side of the screen). Click on the “Settings” button located just above that. We need to make a few changes that will make this virtual machine work perfectly.
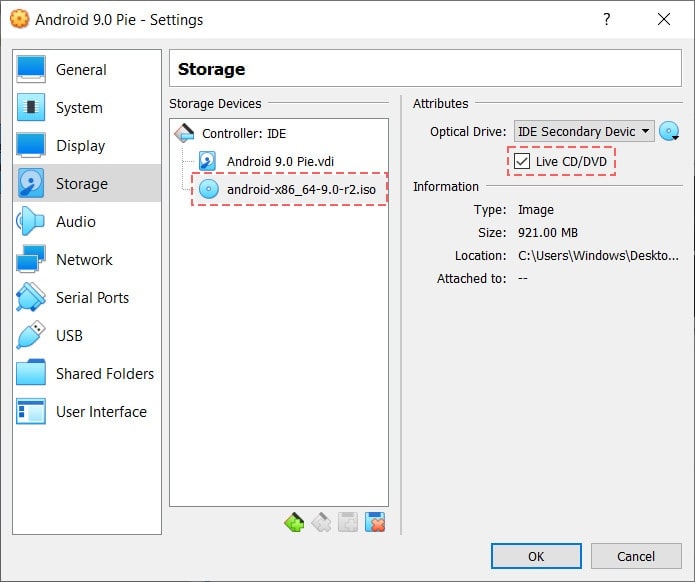 Add Android 9.0 ISO image for VirtualBox
On the Storage panel, select “Empty” disk then click on the CD icon next to this. Browse to the location of the “Android Pie ISO” file, click on the file and click on “Open”. This will be added to Storage Tree. Turn on “Live CD/DVD” button. Click “OK” to save the changes.
On the Display panel, increase the Video RAM to 256 MB and enable 3D Acceleration. Leave everything else unchanged.
Step 4: Install Android in Virtual Machine with VirtualBox
Select the your Virtual Machine and click on the “Start” button. This starts the VM; it is just like pressing the power button on your phone or computer. When it boots, you will see four options. Choose “Advanced Options”. Select “Auto Installation – Auto install to specified hard disk”. The installation process will start and will be over in a short time.
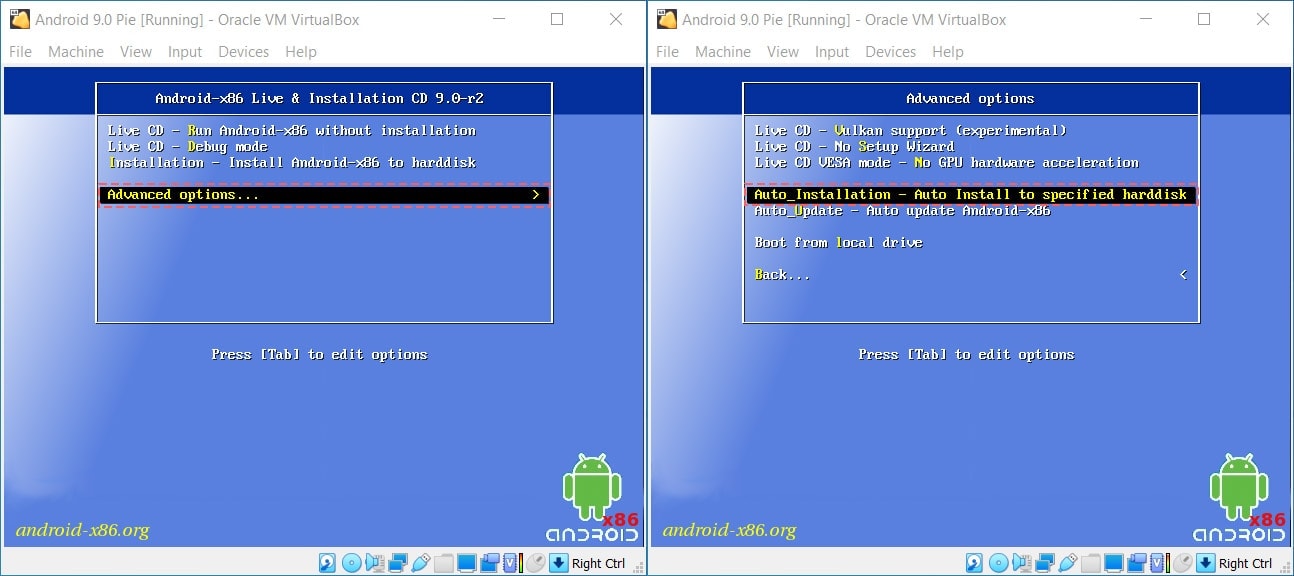 Install Android 9 on VirtualBox
Step 5: Boot to xForce Mode
Press “e” button to edit the commands before boot to android 9.0.
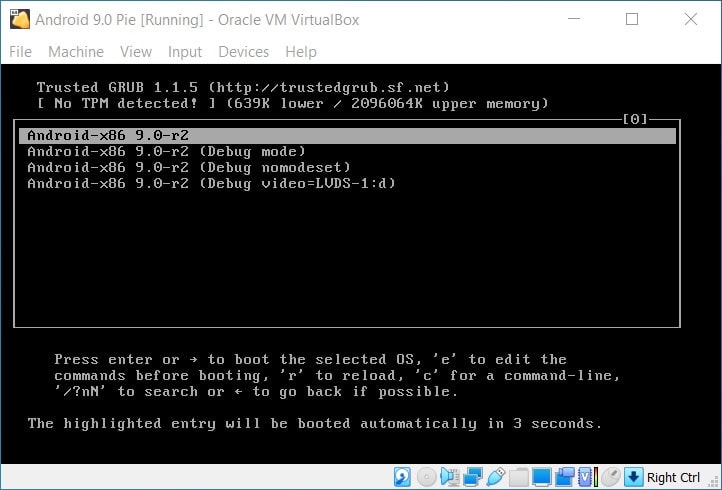 Boot with xForce mode
Press “e” button again, and replace “quiet” with “nomodeset xforcevesa” then press “Enter” to save this commands. Press “b” button to boot with this command.
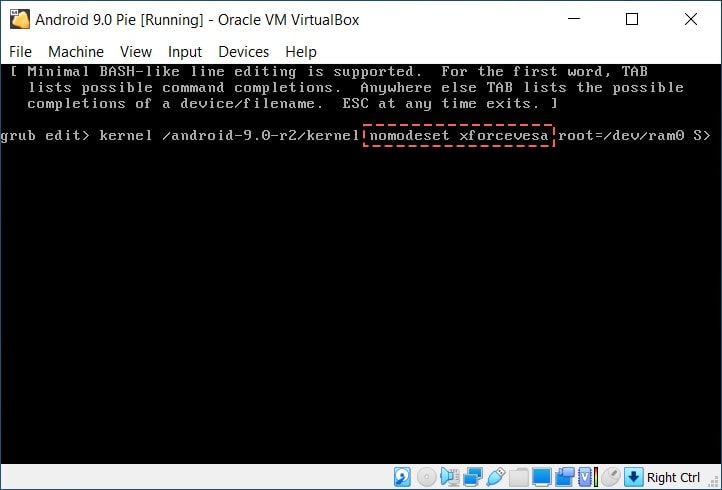 Press e to edit command
Step 6: Run Android 9.0 Pie in VirtualBox
After successful installation, click on “Skip” button to create a new account without Internet.
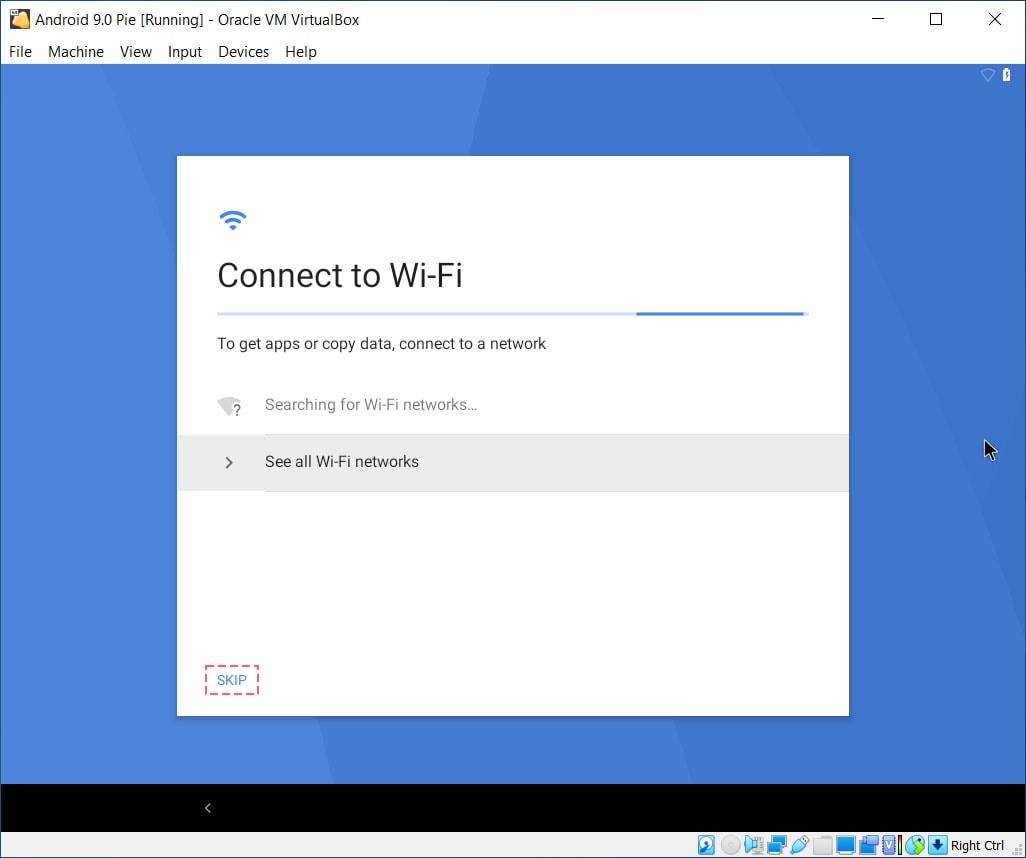 Skip to connect Wifi
All that is left is now enjoy the Android Pie on your Mac or Windows PC!
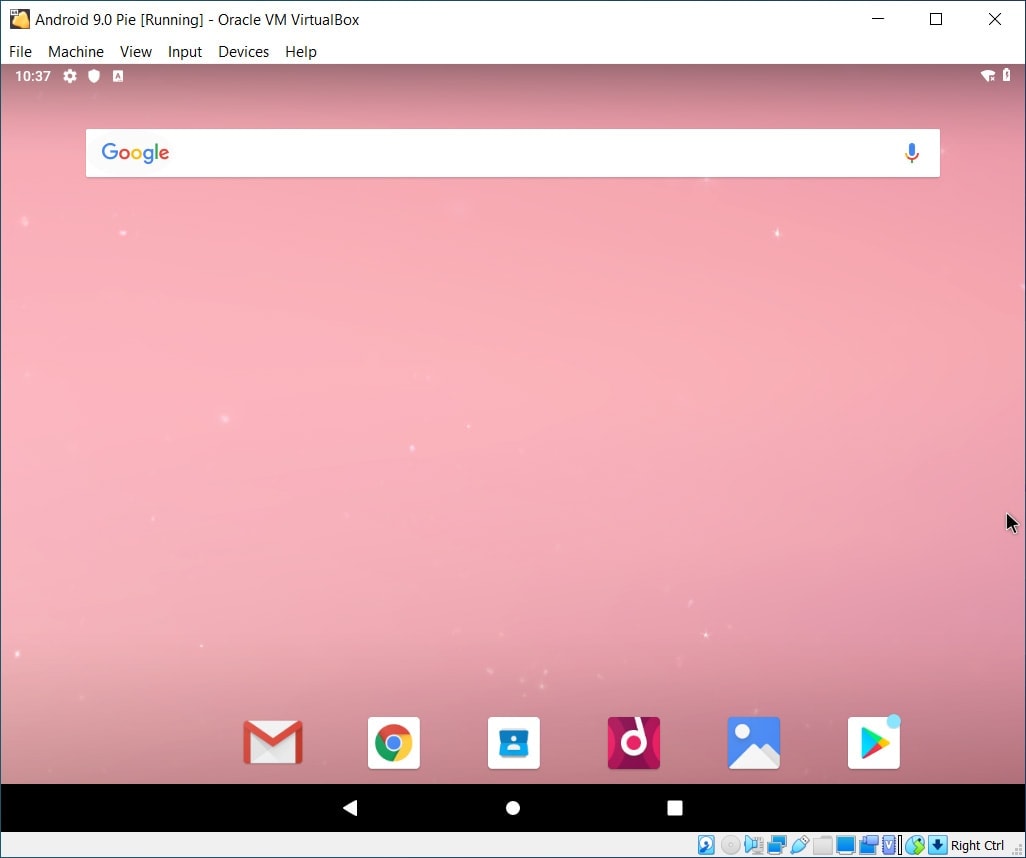 Android 9.0 Pie on VirtualBox
To connect Internet in Android 9.0 Pie on VirtualBox, go to Wifi Setings in Android and connect to “VirtWifi”.
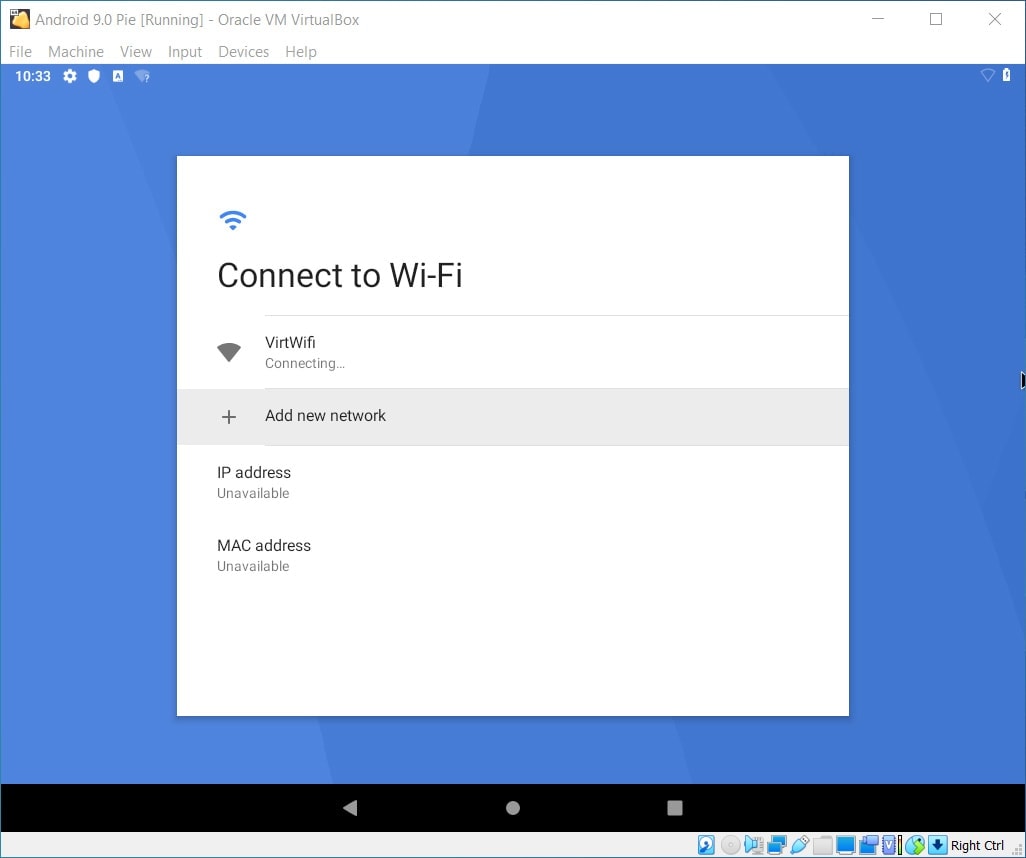 Connect to Wifi on Android Pie
Bottom Line
Creating an Android virtual machine on your computer is possible thanks to the leading free virtualization software. Whether you choose VMware or VirtualBox, the bottom line is that you will be able to operate Android 9.0 Pie on your computer. These virtualization programs are great and they will deliver a great experience. The best part is that there are free versions that are feature-laden. It will work so well you will regret why you had not tried it earlier. Give this a try and tell us how your experience was.
source : https://techsviewer.com/install-android-in-virtual-machine-vmware-and-virtualbox/
by John