Plus
You are not permitted to download, save or email this image. Visit image gallery to purchase the image.

If we put aside time to cook for the joy and satisfaction it brings rather than simply seeing it as a necessity, it can feed not only the body but also the mind and soul, Nelson chef and food writer Nicola Galloway says.
Galloway sees her new book The Homemade Table as more than just a book about preparing home-cooked food but one that encompasses a way of living and thinking about food.
To this end, she has separated the book into two parts – one with seasonal recipes based on daily meals while the other is a deep dive into her favourite sourdough, fermenting, cheesemaking and preserving recipes.
“Many are recipes I cook throughout the year, depending on the season; they are the recipes my family ask for often, with their tick of approval.”
Galloway, whose love of food was inspired by her nana Ngaire, trained as a chef and studied nutrition. She is now a culinary educator and food writer.
She discovered fermenting and sourdough while living in Canada about 20 years ago and during the past 20 years has gone on to create recipes that work for the family kitchen.

“Recipes and techniques can take time and commitment, to learn the basics and then eventually to master.”
So she suggests dipping in to those chapters when time and interest allows, but she points out she does not make everything from scratch all of the time. Although it is more economical to make food from scratch, people’s busy lives do not allow for this all the time.
“In busy weeks I will buy good-quality staples such as yoghurt and crackers, always choosing quality over quantity with a short list of ingredients I recognise.”
Her advice to people just starting the home-made journey is to keep it simple, focus on one or two recipes at a time so they become second nature and part of the kitchen rhythm before trying another one.
“If you try to do everything all at once, you may be setting yourself up for overwhelm and potential failure.”
There is also plenty of advice for troubleshooting if something goes wrong with these recipes.
The book also includes information on stocking the pantry – she tends to buy in bulk as much as possible, with a steady rotation to ensure freshness – as well as some quick recipes for cooking basics.
She has also provided information where possible for substitutions for gluten, wheat and dairy as well as suggestions for different vegetables and fruits depending on availability.
Recipes extracted from The Homemade Table: Seasonal Recipes, Preserves and Sourdough by Nicola Galloway, published by Potton & Burton, RRP: $59.99. Photography by Nicola Galloway.

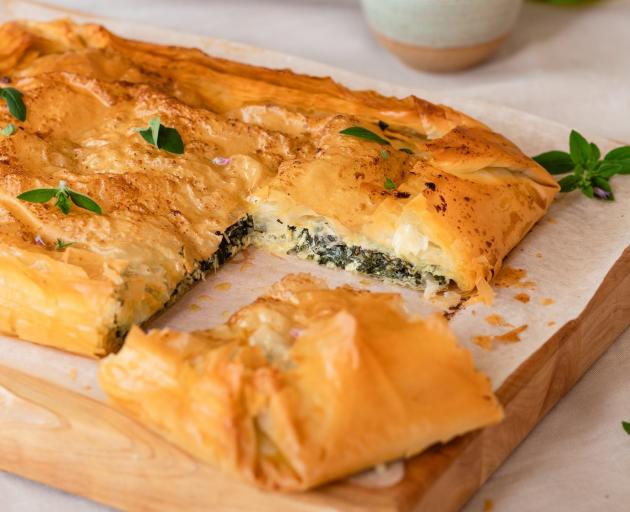
A simple spanakopita-inspired pie (or filo parcels) to use all those sprightly spring greens, with a heavy dose of fresh herbs and complemented with salty feta. I generally use silverbeet as the main green component in this pie because it grows abundantly in the garden and goes much further than spinach when cooked. However, you can also use frozen spinach.
4 Tbsp olive oil
1 leek (about 250g), washed and finely sliced
500g leafy greens – silverbeet, beetroot greens, spinach
pinch of salt
handful of chopped fresh herbs – oregano, thyme, rosemary, parsley, dill
200g feta, crumbled
1 free-range egg, beaten
generous twist of cracked pepper
60g butter
12 sheets filo pastry

Preheat the oven to 190degC (fan 170degC).
Heat a large frying pan over a moderate heat. Add 1 Tbsp olive oil and the leek and saute for 5 minutes to soften.
Wash and roughly chop the greens, stalks included. Add to the pan with the salt. Cover, and cook for 5-6 minutes until the greens have wilted – the water remaining on the leaves from washing will be enough to steam the greens. Remove the lid and continue cooking, stirring constantly, until any excess cooking liquid has evaporated (turn up the heat if needed). Tip on to a plate to cool a little.
In a bowl combine the chopped herbs, feta, egg and cracked pepper.
Fold through the warm greens mixture.
In a small saucepan, melt together the butter and remaining 3 Tbsp oil.
Use a pastry brush to grease a shallow roasting dish with the butter mixture. Unroll the filo pastry and arrange 2 sheets in the dish, brush with the butter mixture, then repeat this layer twice more with 6 sheets of filo used.
Spread the greens mixture evenly over the filo, leaving a 4cm border.
Arrange another 2 sheets of filo on top, brushing with the melted butter mixture, and repeat this filo layer twice more. A total of 12 sheets of filo have now been used. Fold over the edges to encase the mixture and drizzle any remaining butter mixture over the pie.
Bake for 3035 minutes until the pastry is golden. Cut into wedges and serve hot or cold.
The filling above can be used to make filo parcels as follows.
Lay 2 sheets of filo on the bench, with a short side closest to you. Brush generously with the butter mixture. Spoon a heaped tablespoon of the greens mixture on to the bottom left corner of the pastry. Fold over the long edge in half from right to left to cover the mixture. Brush the pastry again with butter. Fold the bottom left corner over at an angle to meet the folded edge, making a triangle shape. Continue to fold left to right in this triangle shape until the pastry is all used up. Place on to a baking tray, brush again, and scatter with sesame seeds. Repeat with the remaining filo sheets and filling. Bake for 20-25 minutes until golden.
This recipe uses about half a packet of filo pastry. Unused filo pastry can be returned to the packet, well-sealed and stored in the fridge for up to a week, or frozen for a month.

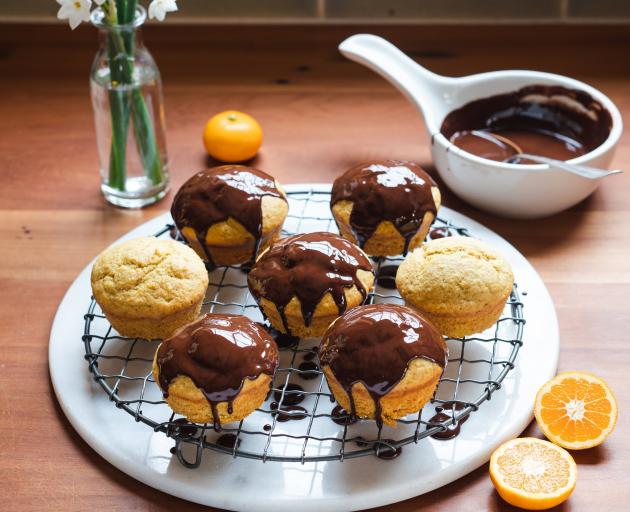
Thank goodness for citrus season! When the early spring days are short, these little pops of orange and yellow bring a welcome freshness to the kitchen. The mandarin tree gifted by my father for my daughter’s fifth birthday is now earning its keep, with the branches heavy with fruit in early spring. A fruit tree really is a gift that keeps on giving.
3–4 medium mandarins (about 150g)
3 free-range eggs
3 Tbsp honey or ¼ cup (50g) sugar
¾ cup (110g) plain white flour – wheat, spelt, or gluten-free flour mix
½ cup (60g) LSA (see below) or ground almonds
1 tsp baking powder
¼ tsp baking soda
80g dark chocolate, broken into pieces
2 tsp olive oil
First, place the mandarins in a small saucepan and cover with water.
Bring to the boil and cook for 30 minutes. Top up with extra boiling water as needed to keep the mandarins covered. After this time, drain and leave to cool completely.
Preheat the oven to 180degC (fan 160degC). Generously grease a medium-sized muffin tray (9 holes will be used), or line with cupcake cases.
Halve the mandarins, removing any pips, and place in a food processor along with the eggs and honey or sugar. Blend until smooth.
Add the flour, LSA or ground almonds, baking powder and baking soda.
Pulse 6 to 8 times until just incorporated – don’t over-mix, or the cakes will be tough.
Spoon the batter into the prepared muffin tray to fill 9 holes.
Bake for 18 to 20 minutes, until an inserted skewer comes out clean.
Cool in the tray for 5 minutes, then transfer the cakes to a cooling rack.
Make the ganache. Place the chocolate and olive oil in a heat-proof bowl and set this over a saucepan of gently simmering water, making sure the bowl doesn’t touch the water. Once the chocolate has melted, remove from the heat, stir and cool for 5 minutes.
Sit the rack of cakes over a plate or tray and slowly pour a tablespoon of ganache over each cake. Leave to set, then use a small knife to loosen the chocolate drips and place these on top of the cakes to decorate.
Store in an airtight container and consume within 3 days.
LSA is a ground nut and seed mixture consisting of equal quantities of linseed (flaxseed), sunflower seeds and almonds. However, it doesn’t have to be limited to these ingredients. I prepare a ground seed mix for use in baking that has equal quantities of golden flaxseeds (linseed), sunflower seeds, pumpkin seeds and sesame seeds. I use a spice (coffee) grinder to grind the seeds in batches until finely ground, then tip everything into a large jar and shake to combine. Store in the fridge, as the seeds’ volatile essential fatty acids begin to degrade once they are ground.

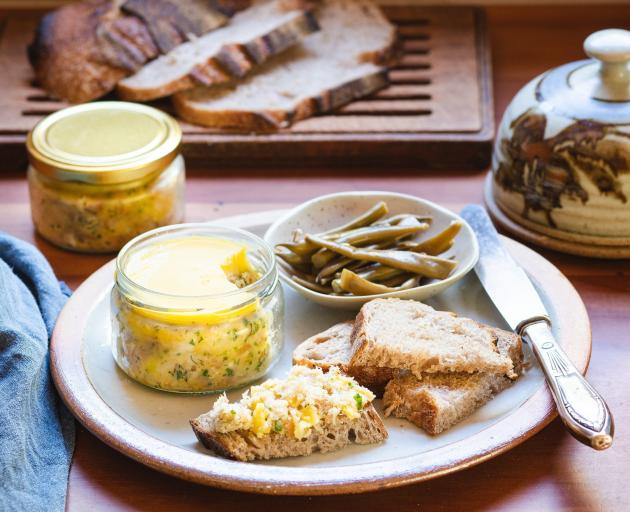
This is possibly one of my favourite recipes in this whole cookbook. I would happily eat it regularly for breakfast, spread thickly on sourdough toast. Potted fish is one of those flavoursome old-fashioned recipes that is designed to extend shelf life by preserving the smoked fish in fat – in this case, clarified butter. If you are familiar with pork rillettes, that is a similar process that uses rendered pork fat (lard).
The infused clarified butter is the base to this recipe, and although it sounds fancy, it is really quite easy to prepare. Because smoked fish is quite salty, I prefer to use unsalted butter in this recipe.
150g unsalted butter
1 bay leaf
small sprig of fresh thyme, or 1 tsp dried
6 whole peppercorns
250g white-fleshed smoked fish
2 Tbsp lemon juice
2 Tbsp chopped fresh parsley
1 Tbsp chopped fresh dill, or 1 tsp dried
1 tsp Dijon mustard
cracked pepper

First make the infused clarified butter. Place the butter, bay leaf, thyme and peppercorns in a small saucepan.
Melt the butter over a low heat, then simmer gently for 12-15 minutes until the butterfat and milk solids separate. The butterfat will be golden clear and you will be able to see the milksolids at the bottom of the pan. Remove from the heat and strain the butterfat through a fine sieve into a jug. Discard the milksolids and aromatics.
In a small mixing bowl, flake the fish and add the lemon juice, herbs, mustard and a generous twist of cracked pepper. Pour over three-quarters of the infused clarified butter and stir well to combine. Spoon into 2 x 250g clean wide-mouthed jars, packing firmly to remove air bubbles, and smooth the surface. Top each with a thin layer of the remaining clarified butter and place in the fridge to set.
The pots will keep for 2 weeks in the fridge. Ideally, sit at room temperature for 20 minutes for the butter to soften before serving.
Delicious served with lacto-fermented brine pickles.
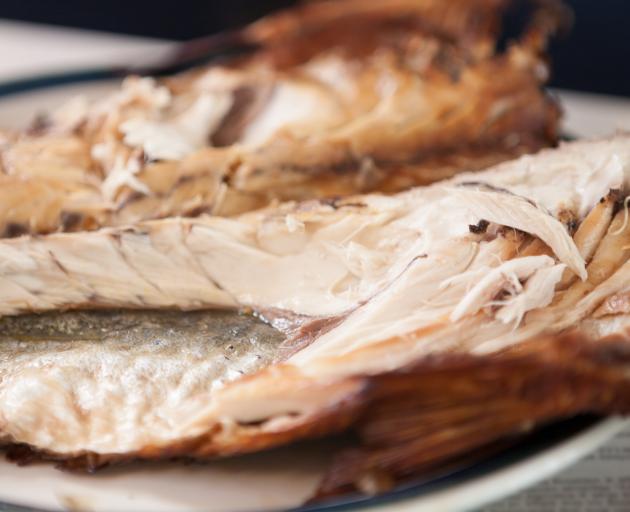
Smoking is an excellent way to extend the shelf life of an otherwise quick-to-spoil food such as fish. In days gone by, the fresh fish that didn’t sell at the market would have been either smoked or salted to preserve it for many weeks or months longer.
I tend to go for the oilier white-fleshed fish such as kahawai, warehou, mackerel, or trevally as their flavour and texture benefits from the smoking technique, although any smoked white-fleshed fish would work fine in this recipe.
If you are lucky to have a supply of fresh-caught fish, it is worth learning how to hot-smoke (there are lots of online video tutorials) so that you can smoke excess fresh fish – personally, I find smoked fish freezes better than fresh fish.
SUBSCRIBER
SUBSCRIBER
SUBSCRIBER
SUBSCRIBER
SUBSCRIBER
SUBSCRIBER
SUBSCRIBER
SUBSCRIBER
SUBSCRIBER
SUBSCRIBER